Power Tools GUI Tutorial Step 7
Step 7: Removing Small Surfaces
Some surfaces are too small for analysis and should be removed from the model. In this example, Surface 15 and Surface 17 may fall into that category, assuming that the distance between curves on these surfaces is smaller than the desired final mesh size. You can remove these surfaces by extending adjacent surfaces until they intersect.
- Rotate the model to the following orientation
- Press Analyze on the Geometry Power Tools menu
You will notice that a new category has appeared labeled Overlapping Surfaces. This is because there are two new surfaces created for each of the webcuts that overlap a surface on the original body. This can be removed using the Imprint/Merge function which will be explained in Step 9.
- Zoom to Surface 17 in the graphics display
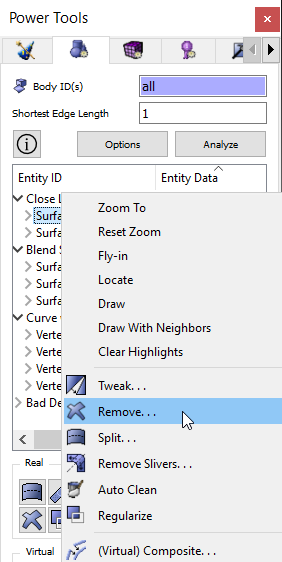
- Right Click on Surface 17 in the Geometry Repair window and select Remove
OR
- Press the Remove Button
 on the tool bar
The Control Panel will appear under the Geometry-Surface-Modify- Remove heading. The Surface id should appear in the input window.
- Make sure that Surface 17 appears in the window and the Extend button is checked
- Press Apply

The small surface no longer appears.
- Highlight Surface 15 and select the Remove option
Surface 15 is shown highlighted in the following image.
- The Geometry-Surface-Modify-Remove option appears on the Control Panel. Make sure that Surface 15 appears in the input window.
- Press Apply
Reset the Zoom to show the entire model.