Power Tools GUI Tutorial Step 6
Step 6: Web Cutting
Since the model has several through holes, sweeping is not possible from a single source and target. However, it is possible to divide the model into three sweepable regions. The figure below shows where to divide the model to get it into sweepable regions. These regions coincide with the holes in the model.Web cutting is this process of dividing volumes into sweepable regions by cutting with a plane. For this exercise, you will use the curves that were just created with the split surface command to cut the volume.
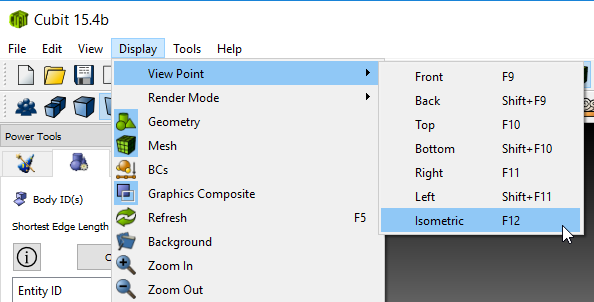
In order to visualize the process more clearly, switch to the isometric view.
- Change the view to isometric in the Display menu under View Point
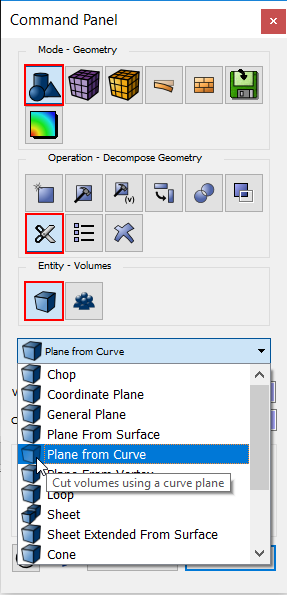
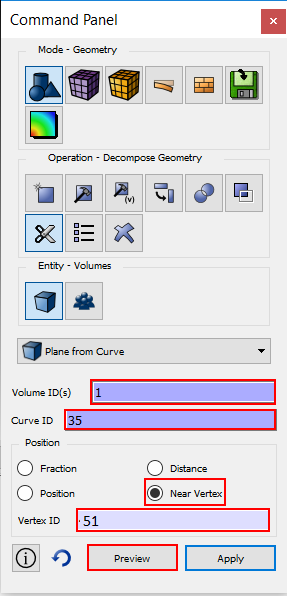
The web cutting menu is located under Geometry-Webcut-Volume on the Control Panel.
- Click on Geometry, then Webcut, then Volume on the Control Panel
- Select Plane from Curve from the list of options
The following image shows the entity ids that will be used to webcut the volume. Select entities with the mouse by clicking on them.
- Enter Volume 1 by typing it or selecting from the graphics window
- Enter Curve 35 by typing it or selecting from the graphics window
- Change the Type to Near Vertex
- Enter Vertex 51 by typing it or selecting from the graphics window
- Press Preview
A blue preview plane should appear in the following position. Check to make sure that your model looks the same.
- Press Apply
The volume has now been split into two volumes. Volume 2 is shown in yellow.
Repeat these steps with the other side of the part. The Volume and Curve ids will remain the same.
- Enter Vertex 49 in the input window or select from the graphics window
- Press Preview, then Apply
The final webcut volume should look like this: