GUI Basic Tutorial Step 6
Step 6: Setting Interval Sizes
The volume shown in Step 5 will be meshed by sweeping a surface mesh from one side of the brick to the other. Before generating any mesh, the user must specify the size of the elements to be generated. In this example, one element size will be specified for the volume as a whole and a smaller size will be specified for around the hole. A direct interval setting will be specified for the sweep direction.
To set the interval size for the overall volume, do the following:
- Change the mode to Meshing, then select Volume followed by Intervals.
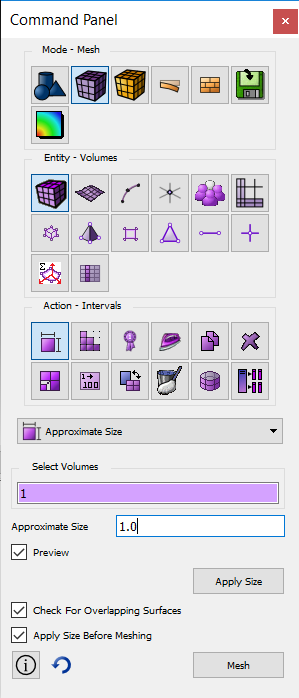
- Place the cursor into the Select Volumes field. Since this is a pick widget, click anywhere on the volume in the graphics window. Alternatively, type 1 in the field. Set the Interval Size to 1.0 and select Apply Size
Since the brick is 10 units in length on a side, this specifies that each straight curve is to receive approximately 10 mesh elements.
In order to better resolve the hole in the middle of the top surface, we set a smaller size for the curve bounding this hole.
- Change the object of the command panel to curve by selecting Curve from the Entity buttons and Mesh from the Action Buttons.
Note: There is not a separate interval action panel for curves. The interval and mesh actions for curves are grouped together in one panel.
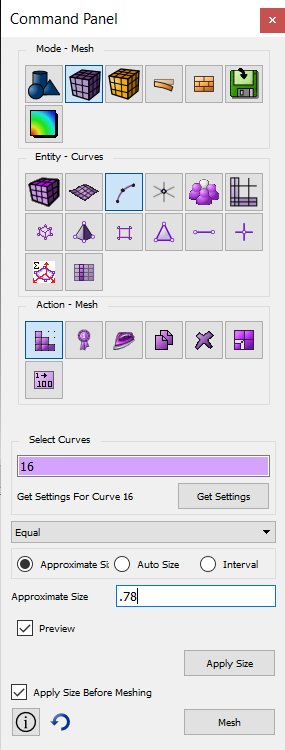
- Place the cursor into the Select Curves pick widget field. Select the near end of the cylinder in the graphics window. Once you have selected the curve, the id of that curve, 16 should appear in the Selected Curves field. Select Size
- Enter 0.78 for the size and select Apply Size.
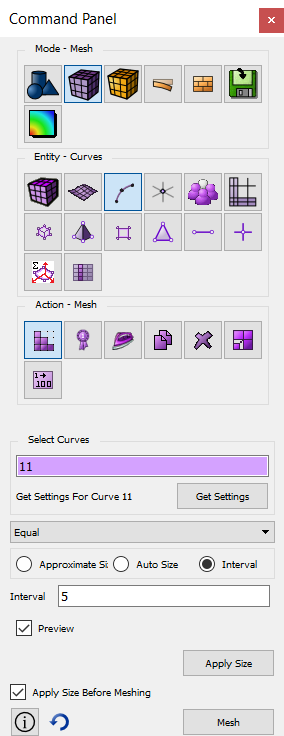
Finally, we would like to generate exactly 5 element layers in the sweep direction. This is accomplished by setting the intervals on one of the curves in the sweep direction.
- Place the cursor back into the Selected Curves field and enter 11.
- Select the Interval radio button
- Enter an interval count of 5 and select Apply.