Toolbar Customization
For many years Cubit has provided users with the ability to create custom tool buttons. These custom buttons launch pre-defined journal or Python scripts. With the release of Cubit 15.4 this capability has been expanded.
Menu
- Importing an Existing Toolbar
- Exporting a Toolbar
- Creating a new Toolbar
- Creating a Command Panel Button
- Creating a Journal File Button
- Creating a Python Script Button
- Creating a Basic Tool Button
- Modifying an Existing Toolbar
Importing an Existing Toolbar
- Locate and press the Custom Toolbar Editor button located on the File Tools button bar. This will launch the Custom Toolbar Editor.

![]()
- Select Import from the context menu
![]()
From this dialog a user may import an entire package containing multiple toolbars or a single toolbar. In this example we will import an entire package containing multiple toolbars.

- After selecting import, an import summary is shown.
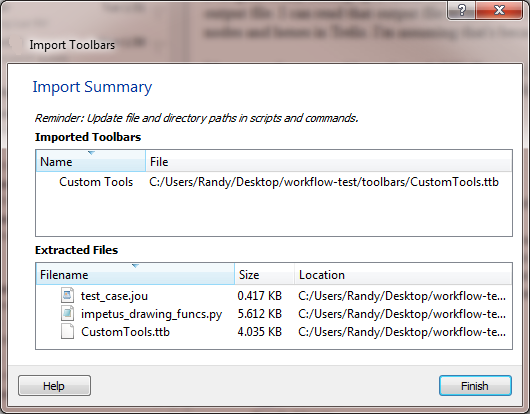
- Select Finish

- Select OK to finish the import
The new toolbar and buttons will be displayed as the last toolbar on the GUI. It is a docking window so it can be moved and placed anywhere on the GUI.
Creating a New Toolbar
- Locate and press the Custom Toolbar Editor button on the File Tools button bar. This will launch the Custom Toolbar Editor.
- Press the Add button
- Name the new toolbar and press OK
![]()
-
Press the Add button in the Buttons area
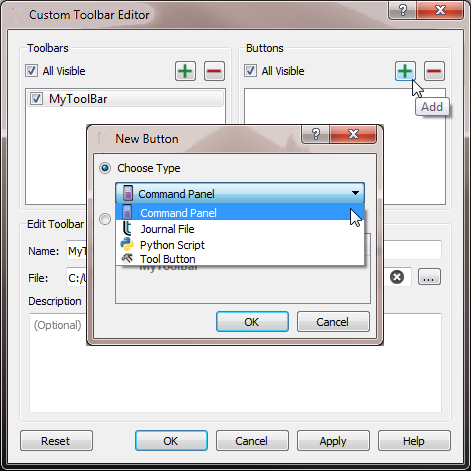
A user may define 4 different types of toolbar buttons
- Command Panel
- Journal File
- Python Script
- Tool Button
Creating a Command Panel Button
A Command Panel Button enables users to launch a command panel with the push of a button. A command panel button can be defined one of three ways:
Use the definition dialog
- Select Command Panel from the New Button type pulldown menu
- Press OK
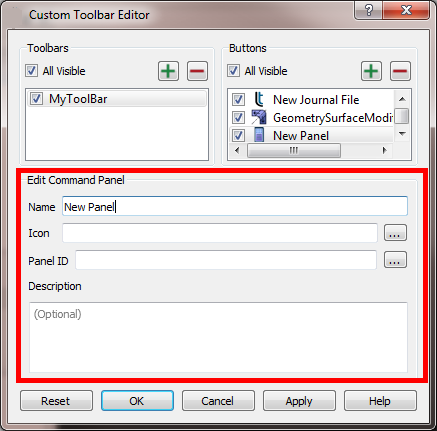
- Complete the dialog indicating
- the name of the button
- the icon to use
- the panel ID of the command panel to show -- see instructions for find the panel ID (below)
- an optional description of the command panel
- Press OK to save the definition and exit the dialog
- Or, press Apply to save the definition
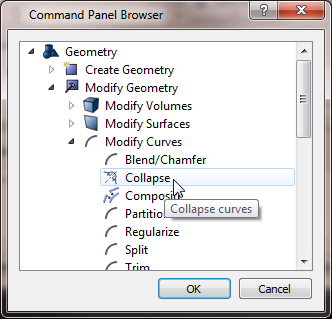
- Press the browse button next to the Panel ID edit field to launch the Command Panel Browser
- Navigate the browser to locate the desired command panel
- Select the desired command panel
- Press OK to make the selection
- The Panel ID will be shown in the Panel ID edit field

Use the context menu on a command panel
- Show the context menu on a command panel
- Select Add to Toolbar
- Select the toolbar to which this command panel will be added
- an icon representing the command panel will be added to the selected toolbar

Drag a command panel onto the toolbar
- Using the mouse, "drag" the command panel onto the desired toolbar
- an icon representing the command panel will be added to the selected toolbar
- In the image below, the Surface Collapse command panel is being dragged onto a toolbar

- The resulting toolbar looks like the following

All command panels include a context menu which can be accessed by clicking on an empty place in the command panel and using the mouse to show the menu.
Creating a Journal File Button
A Journal File Button will launch a journal file when pressed. The journal file may reside anywhere on the file system. A journal file button is defined by:
- Select Journal File from the New Button type pulldown menu
- Press OK
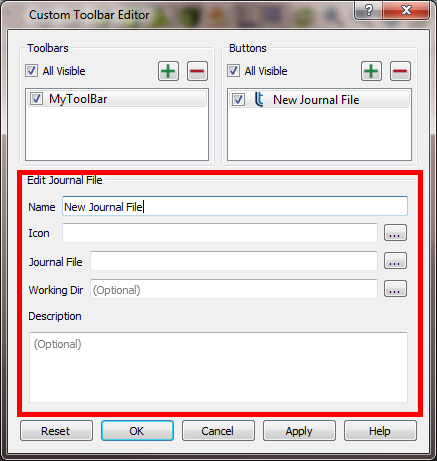
- Complete the dialog indicating
- the name of the button
- the icon to use
- the name of the journal file to play
- an optional working directory
- an optional description of the journal file
- Press OK to save the definition and exit the dialog
- Or, press Apply to save the definition
Creating a Python Script Button
- Select Python Script from the New Button type pulldown menu
- Press OK
- Complete the dialog indicating
- the name of the button
- the icon to use
- the name of the Python script to execute
- an optional working directory
- an optional description of the Python script
- Press OK to save the definition and exit the dialog
- Or, press Apply to save the definition

Creating a Basic Tool Button
The "Basic" too button has been available to users for many years. It contains a set of commands that execute when the user presses the button.
- Select Tool Button from the New Button type pulldown menu
- Press OK
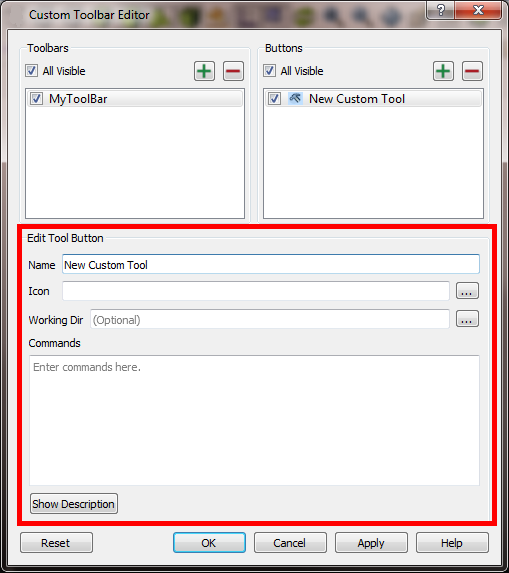
- Complete the dialog indicating
- the name of the button
- the icon to use
- an optional working directory
- the commands to execute (these are the same commands used in any journal file)
- an optional description of the commands
- Press OK to save the definition and exit the dialog
- Or, press Apply to save the definition
Modifying an Existing Toolbar
- In the Custom Toolbar Editor select the toolbar to modify
- Press the Add (green plus-sign) button to add a new button
- Press the Delete (red minus-sign) to remove a button
- Select the check box to hide or show the button
- Change the button order by selecting a button in the Buttons dialog and dragging to a new position
- Any other parameter may be modified using the Edit Tool Button dialog
- Press OK to save the definition and exit the dialog
- Or, press Apply to save the definition

Exporting a Toolbar
A user may want to share a toolbar, or a set of toolbars, with another user. This is easily accomplished.
- Launch the Custom Toolbar Editor dialog by selecting the
 icon.
icon. - Or, select the Edit item from the toolbar's context menu
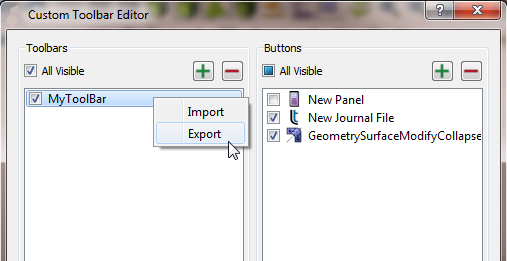
- Select Export from the context menu
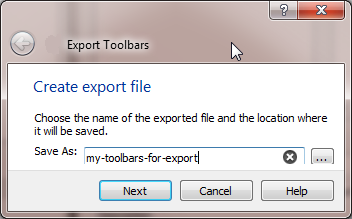
- Provide a file name to the Export Toolbars dialog. The file extension will be appended automatically
- The file type will be .tar.gz
- Click Next on the dialog
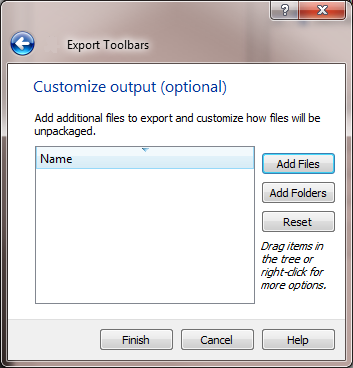
- In the next dialog select the toolbars to be included in the export
- Click Next on the dialog

- Optionally add files or folders that contain journal files or Python scripts referenced by tool buttons
- Click Finish in the dialog
- Look for the .tar.gz file in the designated folder